#
Genp Method
Video Tutorial: Updated Guide #2 - CC+GenP- Video outdated due to new versions of Genp, CCstopper and others
CURRENT UPDATED Video Tutorial October 2023: - Thanks to the user upload for the straightforward video, hope it helps others
#
Downloads Needed
#
Instructions
#
1. Download Genp 3 - Modded, and extract ALL contents from zip
Antivirus may sometimes delete or move files into quarantine. You can either whitelist as safe or disable antivirus while extracting. This will fix the issue of .exe not showing in the folder after extracted.
#
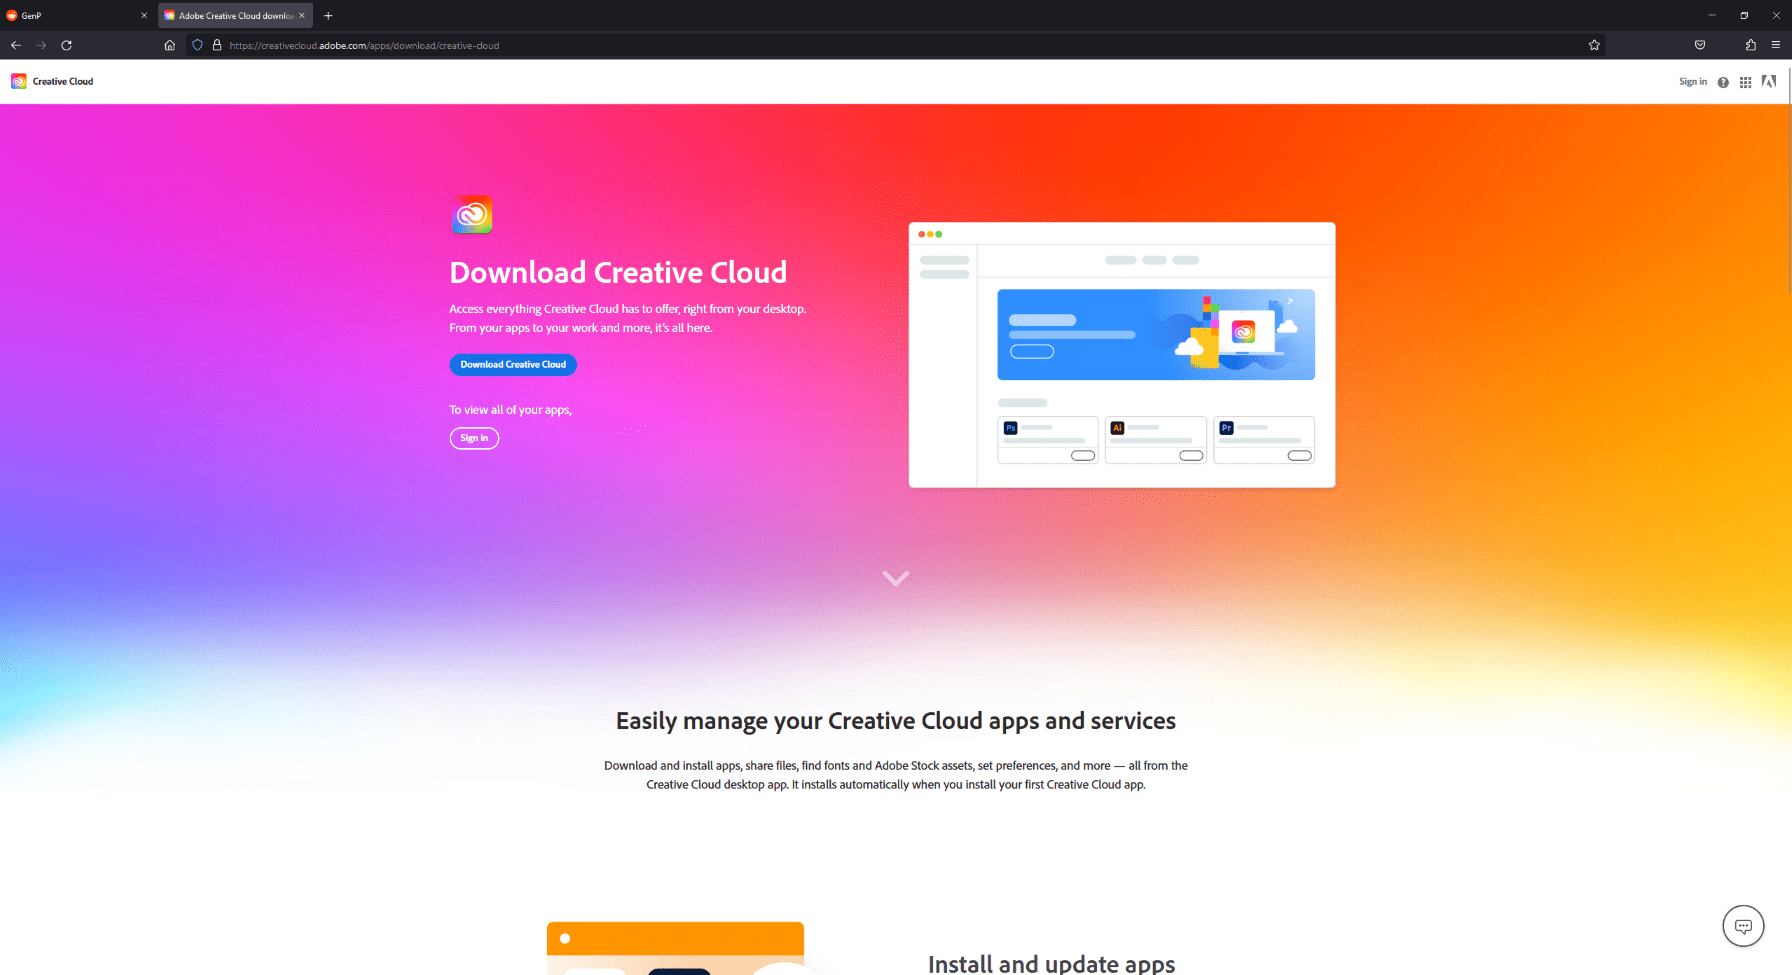
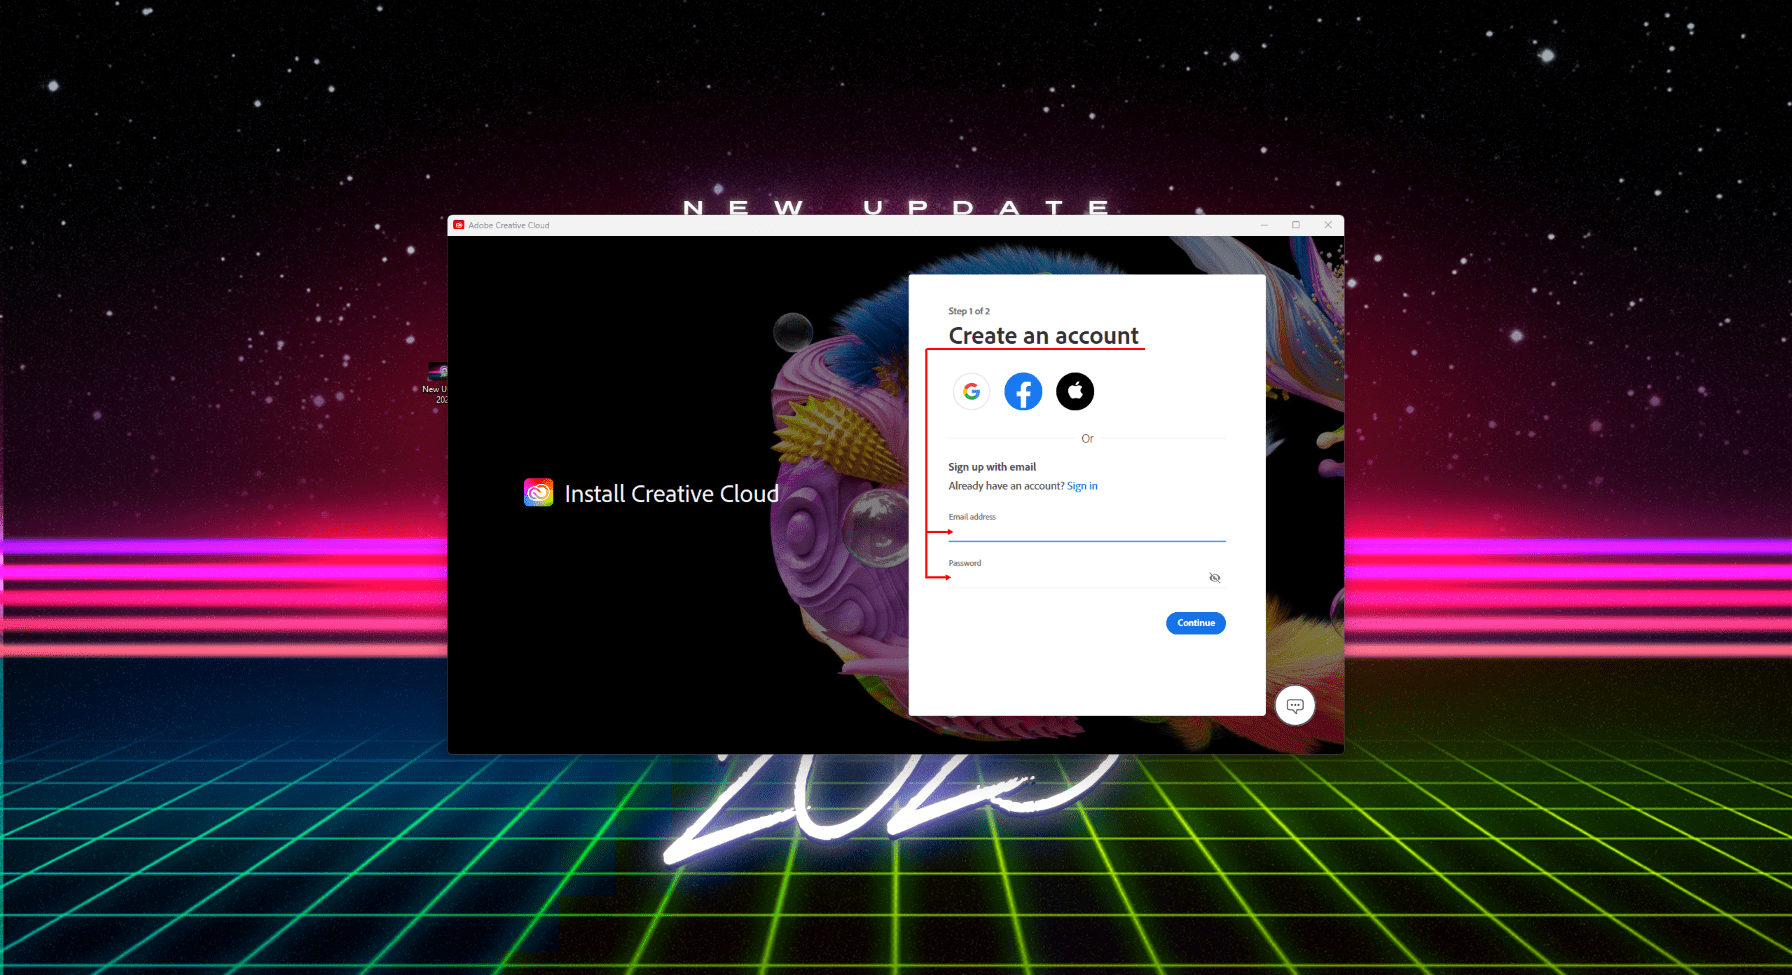
2. Download & Install Creative Cloud
Create a free account or use one you already have, preferably without any ongoing subscription (avoid problems)
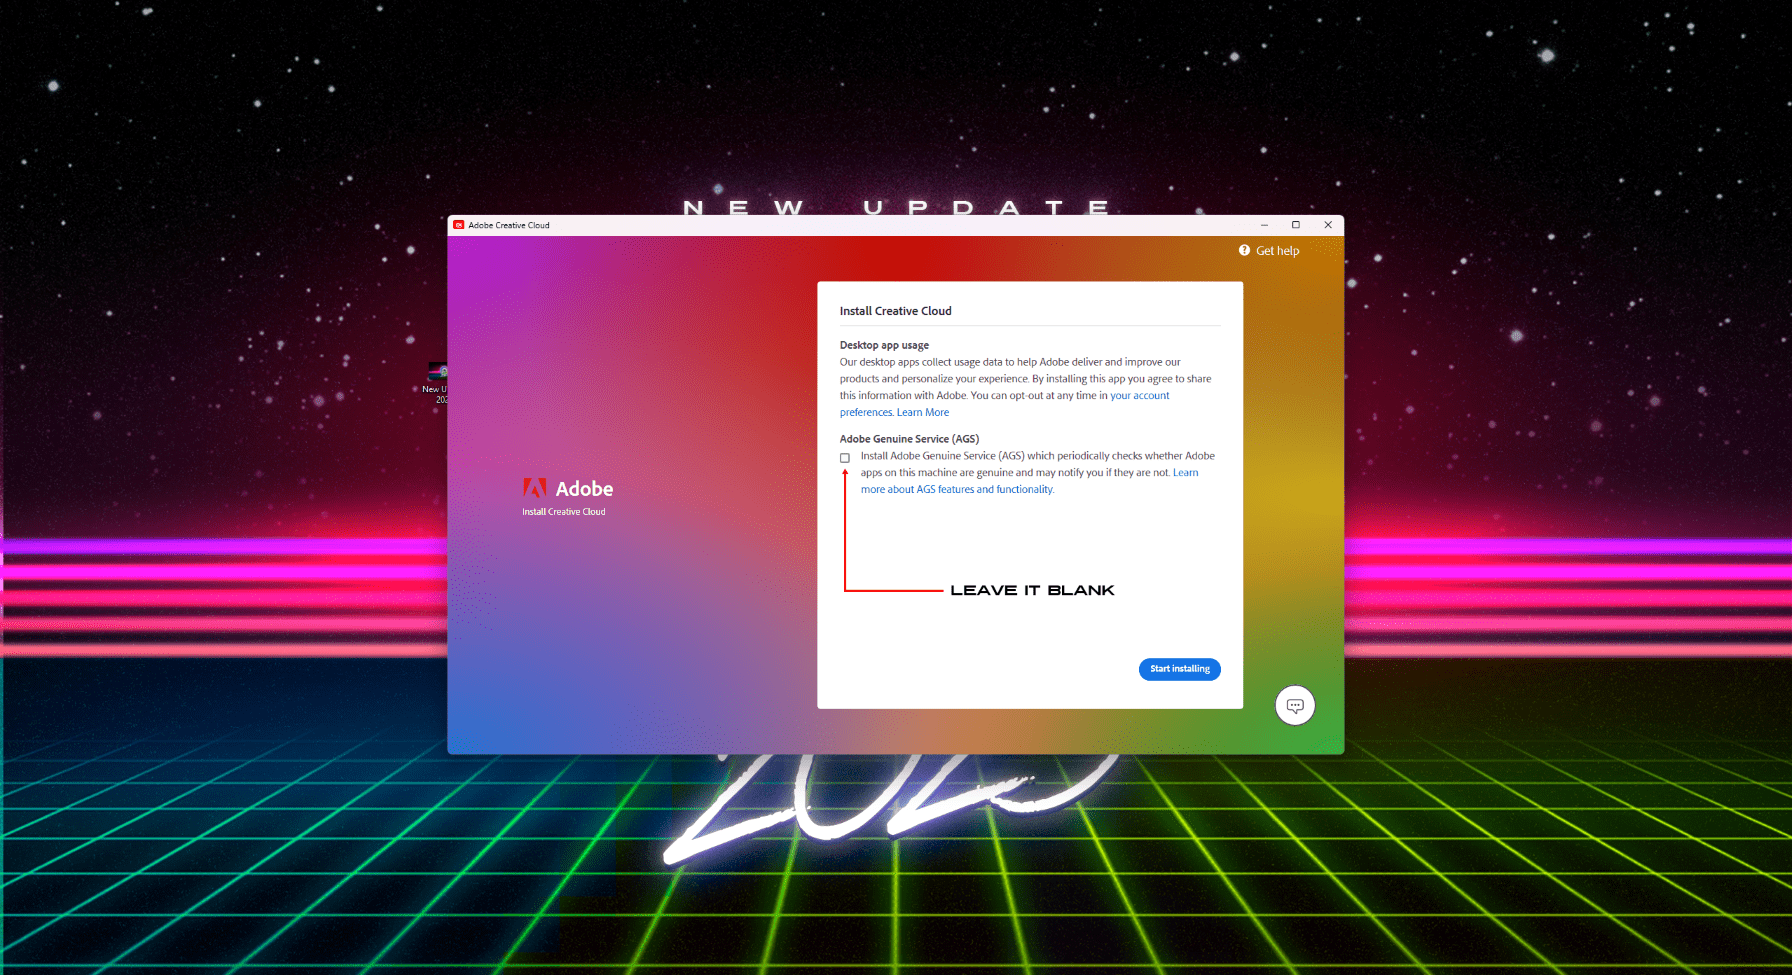
During setup, if possible do NOT install AGS (Adobe Genuine Service)
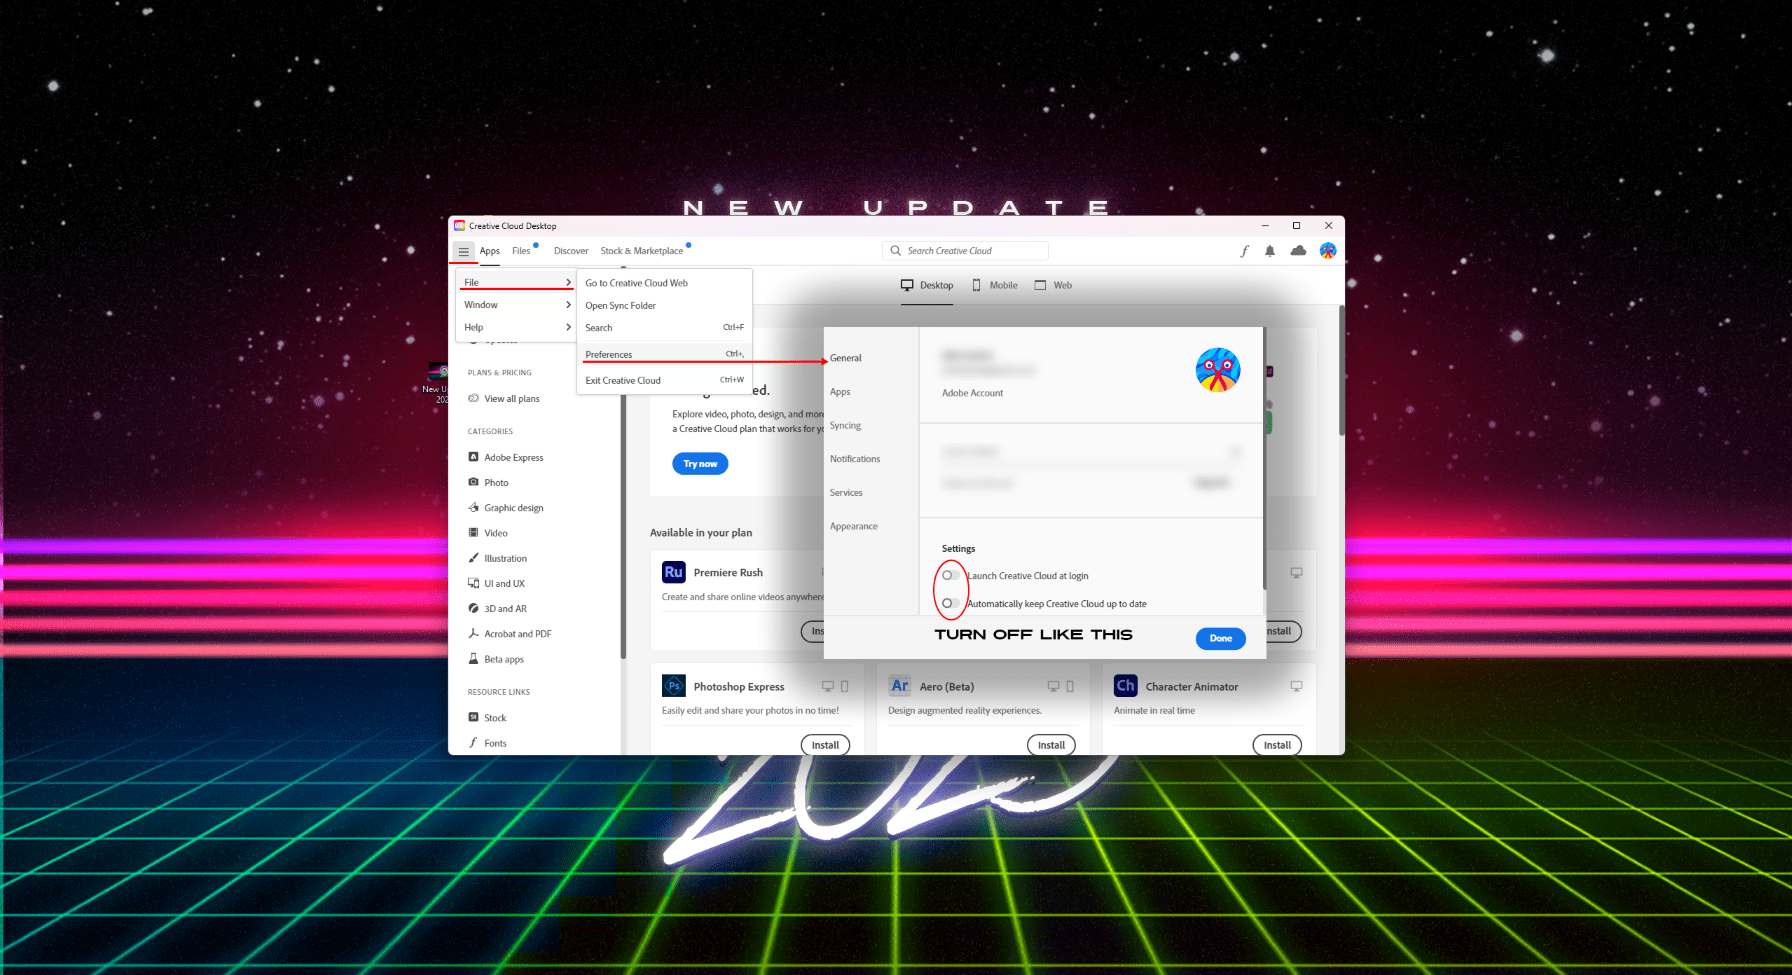
Once installed go to
Menu > File > Preferencesand disable the following:- Launch at login
- Sync files in the background after quitting
- Automatically keep it updated
Once that is done go
Menu > File > Exit Creative Cloud
#
3. Replace Try with Install buttons using Windows Powershell as ADMIN
Thanks AbsentForeskin
Adobe Creative Cloud v.5.11.0.522.1 (June 2023 - latest)
Last updated July 5, 2023
Warnings
IMPORTANT: Do not apply this patch if you have already made any changes to AppsPanelBL.dll or AppsPanelIL.dll.
NOTE: Additional firewall rules or other network changes are not necessary or recommended while using this patch.
#
Overview
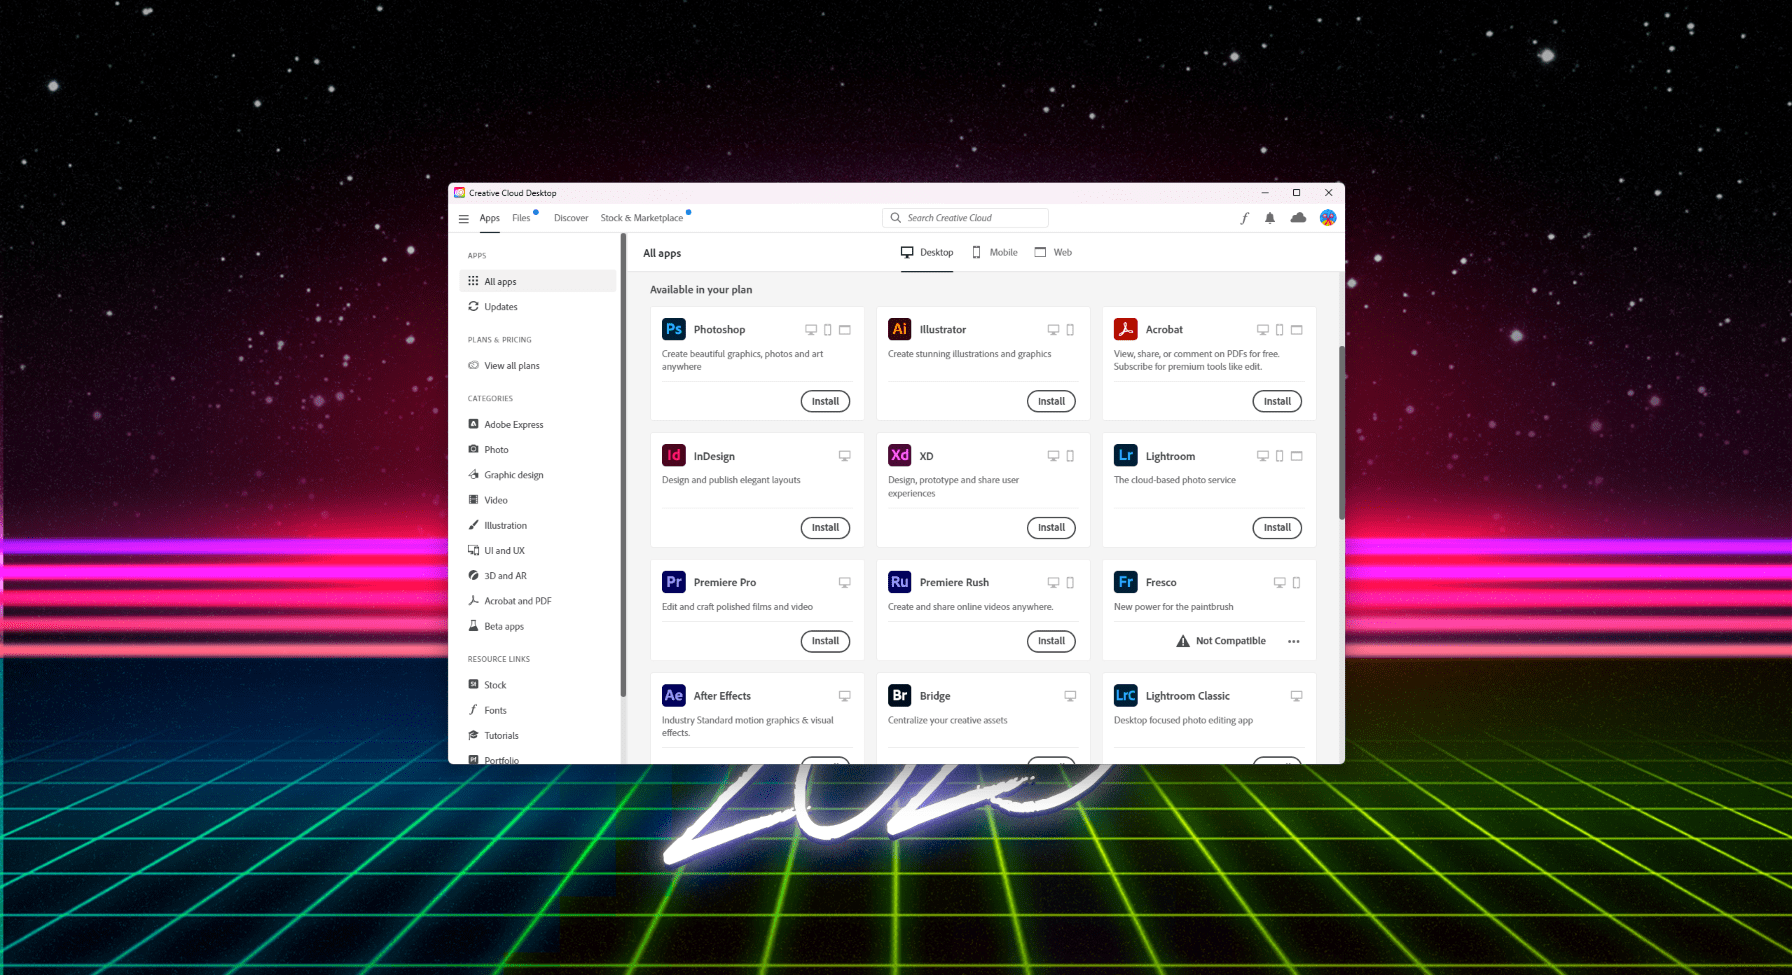
Restoring the "Install" buttons in Creative Cloud Desktop—in place of "Try" buttons, which demand payment information—is possible with PowerShell commands on the current latest release of <:ACC:1123114215285211198> Adobe Creative Cloud (v.5.11.0.522.1). Before you proceed, ensure this is the exact version specified in the "About Creative Cloud" menu, as displayed below—

#
Usage & Steps
Click Windows Button and write "Windows Powershell" right-click, Run as Administrator
Enter the following command first:
Stop-Process -Name "Adobe Desktop Service" -forceEnter the following command to create a backup of your current Apps Panel—
cp "C:\Program Files (x86)\Common Files\Adobe\Adobe Desktop Common\AppsPanel\AppsPanelBL.dll" "C:\Program Files (x86)\Common Files\Adobe\Adobe Desktop Common\AppsPanel\AppsPanelBL.dll.bak"After creating a backup with the above command, apply the Apps Panel patch by pasting the entirety of the following code block into PowerShell and press ENTER—
$bytes  = [System.IO.File]::ReadAllBytes("C:\Program Files (x86)\Common Files\Adobe\Adobe Desktop Common\AppsPanel\AppsPanelBL.dll")
$bytes[1116554] = 0xfe
$bytes[1216383] = 0xfe
$bytes[1987439] = 0xfe
$bytes[2150557] = 0xfe
$bytes[2151982] = 0xfe
$bytes[2152497] = 0xfe
$bytes[2153297] = 0xfe
$bytes[2279801] = 0xc6
$bytes[2279802] = 0x40
$bytes[2279811] = 0xc6
$bytes[2279812] = 0x40
$bytes[2279821] = 0xc6
$bytes[2279822] = 0x40
[System.IO.File]::WriteAllBytes("C:\Program Files (x86)\Common Files\Adobe\Adobe Desktop Common\AppsPanel\AppsPanelBL.dll", $bytes)
If the console prints no errors, restart your machine. Upon startup, Creative Cloud will be ready for use.
#
Error Checking
If you receive an error stating that the file is being used by another process, then Creative Cloud is still partially running. Enter the following command to exit the running service—
Following that command, re-enter the same code block again—
Restart your machine after entering the code block. Upon startup, Creative Cloud will be patched and ready for use.
#
To Restore AppsPannel
To restore from the previously made backup, use the following command—
cp "C:\Program Files (x86)\Common Files\Adobe\Adobe Desktop Common\AppsPanel\AppsPanelBL.dll.bak" "C:\Program Files (x86)\Common Files\Adobe\Adobe Desktop Common\AppsPanel\AppsPanelBL.dll"If no errors are printed to the console, restart your machine. Upon startup, Creative Cloud will be returned to normal functionality—

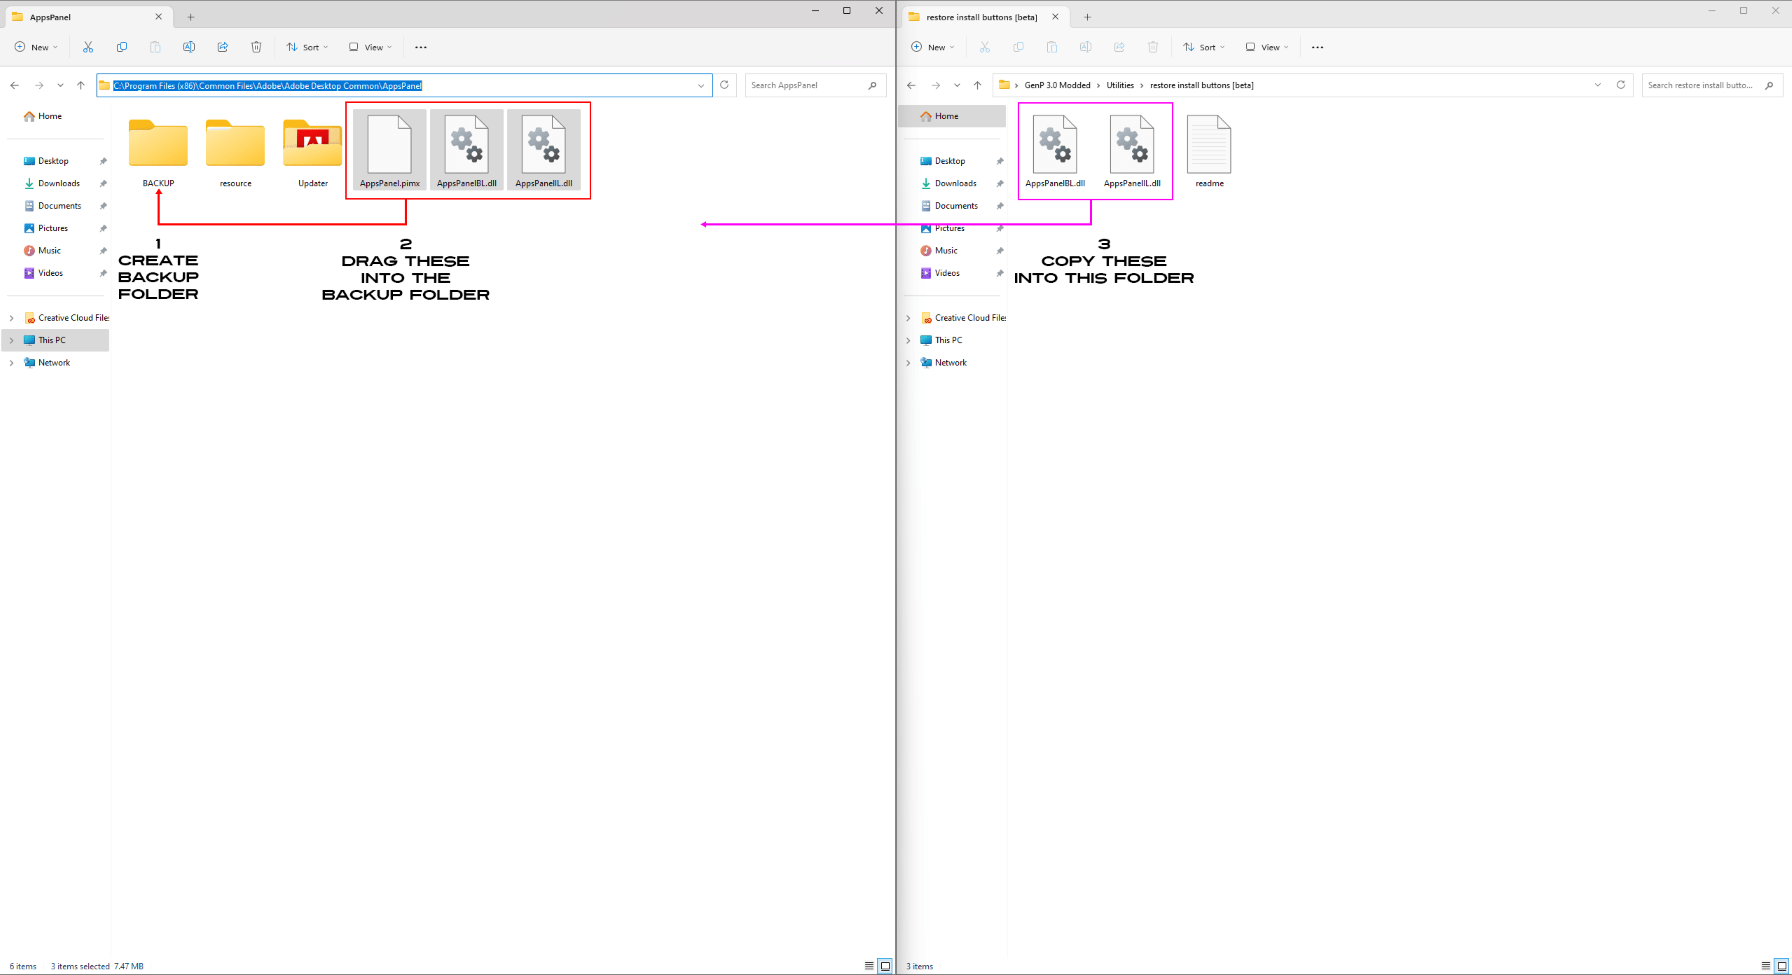
Go to the default folder for adobe in your file Explorer:
C:\Program Files (x86)\Common Files\Adobe\Adobe Desktop Common\AppsPanelCreate a folder inside it named "BACKUP" and move the following files (If you have them) to it:
AppsPanel.pimx, AppsPanelBL.dll and AppsPanellL.dll
(in case you want to restore them to default at a later date)Go to
Genp 3 - Modded > Utilities > restore install buttons [beta], there will be another 2 "AppsPanel" files. You will copy these into the default AppsPanel folder (NOT THE BACKUP ONE).
#
4. Open Creative Cloud > Apps > Install
You should now have the install button, install all the apps you want, wait until everything is installed and DON'T OPEN ANY YET.
Generative Fill / AI online features on PS or others DO NOT WORK ANYMORE - stop asking about it
It's been adapted into the monthly credits for verified paying users (paywall). Therefore, its gone.
Once that is done go
Menu > File > Exit Creative Cloud
#
5. Run GenP on the installed apps
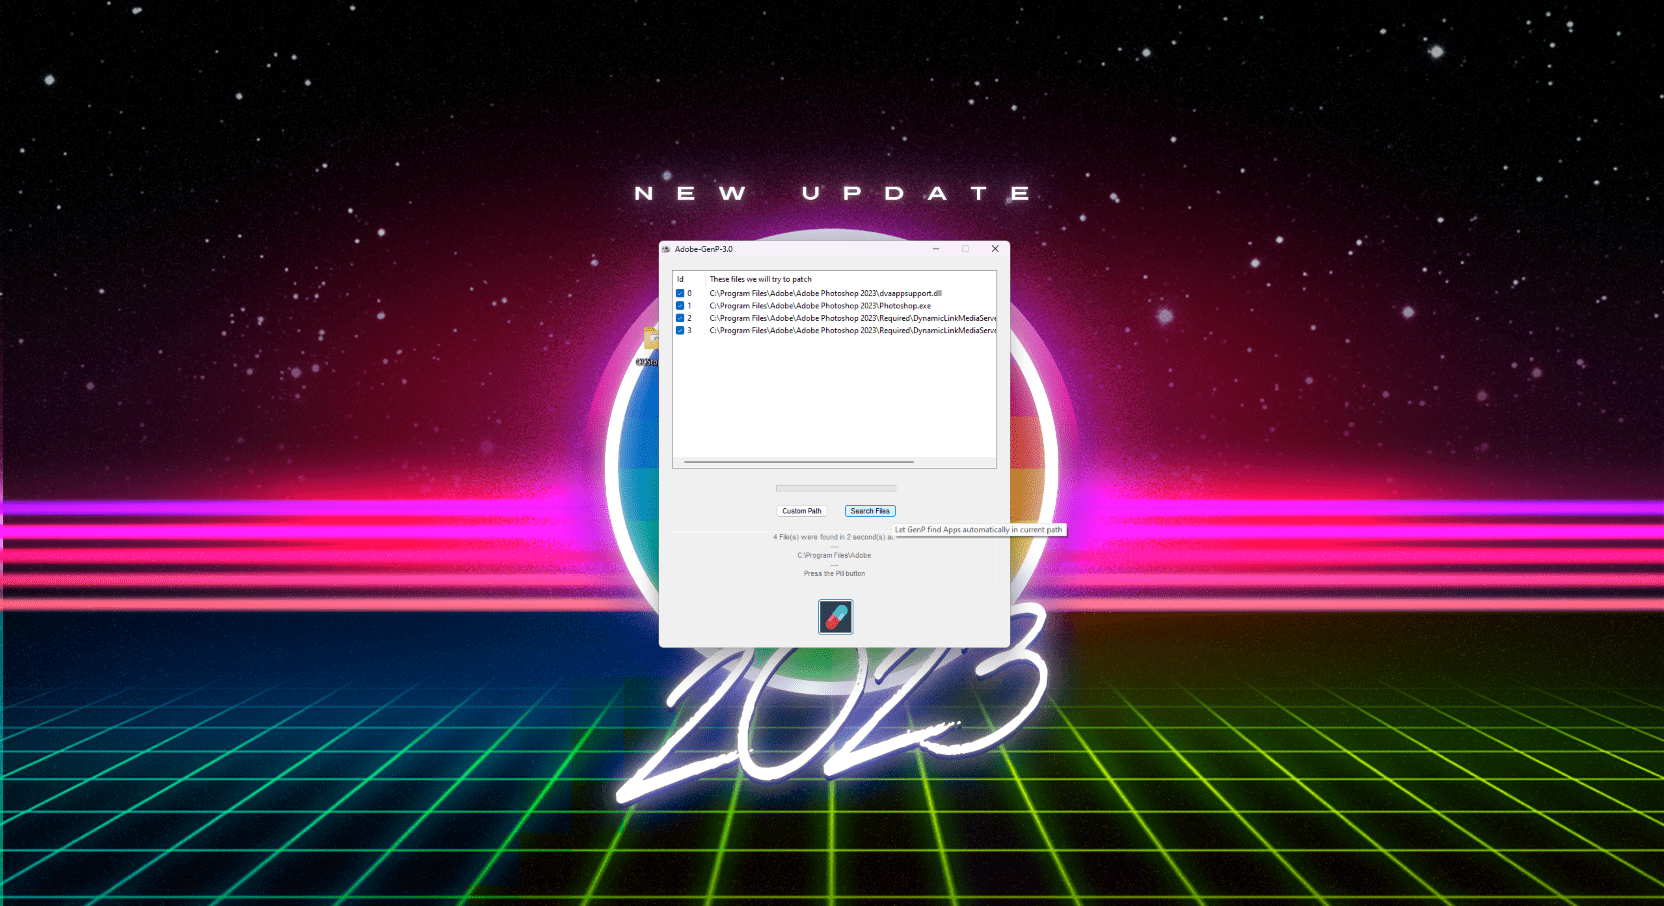
Open
GenP folder > Resources > Run GenP fileIf you're having issues opening it, turn AntiVirus OFF and try again, however don't forget to turn it back ON after its patched.
Click "Search Files" and wait. (will look at the default locations, use custom path if installed somewhere else)
You can de-select paths in case you have any programs you dont want to patch. (in case of using Monkrus Acrobat)
Finally click the PILL to run the patch.
- Everything should be working now
OPEN THE APPS THROUGH THEIR .EXE and NOT FROM Creative Cloud. Meaning press Windows button, write name of app you wanna use that was patched > Open
#
6. Block Adobe Genuine Service URL
Thanks AbsentForeskin
Use the following two commands in PowerShell (admin) if your apps are warning you of unlicensed or non-genuine usage.
Add-Content -Path $env:windir\System32\drivers\etc\hosts -Value "`n0.0.0.0`tm59b4msyph.adobe.io" -ForceAdd-Content -Path $env:windir\System32\drivers\etc\hosts -Value "`n0.0.0.0`tic.adobe.io" -ForceIf you prefer to do this manually, you can add the following two lines to the system hosts file (located in C:\Windows\System32\drivers\etc) using a text editor of your choice—
0.0.0.0 m59b4msyph.adobe.io
0.0.0.0 ic.adobe.io
Everything should be working now
#
7. Optional, therefore ignore - Block Each Installed app via Firewall
(In case of issues like app will be disabled, day counter, unable to launch app due to some popup)
Go to
Windows Firewall > Advanced SettingsCreate Inbound and Outbound rule on each app with issues
Structure is the following:- File Type: Program
- Program: It's necessary to select the actual "program".exe inside the folder that was installed because the shortcut will not work.
- Typical path example would be:
C:\Program Files\Adobe\Adobe Photoshop 2023\Photoshop.exe(Find the proper path for the app you need)
- Typical path example would be:
- Action: Block Connection
- Profile: All
- Name: Name it whatever you want to know what's blocking.
#
8. Optional, therefore ignore - Block AGS via Firewall - (similar to step 4)
- Create both Inbound and Outbound rules on Adobe Genuine Service
Path of AGS -C:\Program Files (x86)\Common Files\Adobe\Adobe Desktop Common\AdobeGenuineClient\AGSService.exe
Always check first the monthly Compatibility List before updating any apps, otherwise don't update.
If you want to install / update more apps, hit "Install/Update" on New app, let it download, and run GenP on them again.
If something ain't working properly check Issues Fix